A suitable source
Upload the image, paint only the editable region, and describe the removal or replacement.
Enhance workflow
Paint a mask and replace the selected region from a local description.
Preview inputs first. The selected model and credit quote are shown before a paid request.
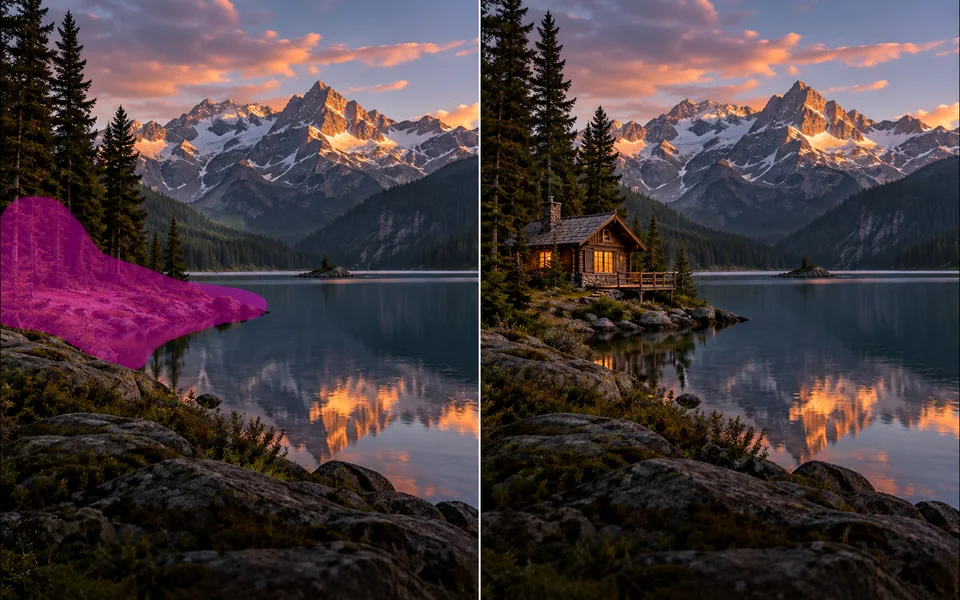
Site-owned example
AI Inpainting example showing the intended workflow result
Controls that match the task
Only the inputs that affect this workflow are shown.
Clear before you run
Model, availability, limits, and paid cost stay visible.
A usable result
Preview the output, then download or continue editing.
Working area
Upload the image, paint only the editable region, and describe the removal or replacement. The result panel stays beside the controls on large screens and moves below them on smaller devices.
AI Inpainting
Configure the input
Model
Local previews and exports do not start a paid generation. Paid operations show their model and credit quote before submission.
Result preview
Inspect the output before downloading or continuing.
Upload your own file above. The workspace stays compact until an image is ready.
Designed around the result
Paint a mask and replace the selected region from a local description. The workflow is organized around a usable output, not a decorative demo.
Upload the image, paint only the editable region, and describe the removal or replacement.
Include a small margin around the object so the model can rebuild surrounding texture. Settings remain visible so the result can be repeated or adjusted.
A revised image where processing is focused on the painted mask.
A predictable workflow
Each stage answers a practical question before the next action is available, so you can spot a wrong input before spending time or credits.
Upload the image, paint only the editable region, and describe the removal or replacement.
Choose only the model, dimensions, mask, style, or layout controls relevant to this task.
Confirm the visible credit quote and the details that must remain unchanged before submitting.
Check edges, text, identity, product details, and output size, then download or move to the next editing tool.
Practical answers
Upload the image, paint only the editable region, and describe the removal or replacement.
Uploading and preparing the request do not charge credits. A paid operation shows its model and credit quote before submission.
A revised image where processing is focused on the painted mask.
A mask guides the edit but does not guarantee pixel-perfect boundaries on complex overlaps.
Keep creating
Ready when you are